
Introduction
Digital printing of photographic images has gone through quite an evolution. From digital negatives to laser printing on conventional photographic papers, chromira enlargers, digital imaging devices used in the negative stage of otherwise conventional enlargers, Iris prints, and various other methods and procedures, including exotic processes such as hand made carbon pigment prints from digital color separations.
In the end, inkjet printing has become the standard method for digital printing. The combination of relative ease of use, convenience, image quality, cost and reasonable longevity is simply hard to beat. Add to that a huge selection of printers and printing materials and it is no surprise that this is the dominant technology for digital printing today.
I still remember the early days of inkjet printing…
In the early 1990’s I used a very primitive “state of the art” printer for business presentations. The prints were pretty awful and they were prone to staining and fading very quickly, but they were very convenient to produce and they were in color, which was a big deal back then.
In those days, most people believed that inkjet technology would never be good enough to reproduce a photographic image with decent quality. I suppose we all are often wrong, but hardly ever in doubt about our opinions!
A decade later, inkjet prints of photographic images were starting to look pretty decent, but permanence was a big issue. Needless to say, there have been major advances in quality as well as permanence over the last 15 years. The inkjet prints we can produce today are stunningly beautiful and have very good expected permanence.
The pace of innovation for a while was such that if one purchased a professional wide format printer, one would consistently expect a new and improved model every one to two years. As the quality of the prints and the capabilities of the printers improved, the pace of innovation has slowed down. Thank goodness, this is the case, it helps our wallets, among other things!
It appears we are now in something closer to a 5 year cycle before significant improvements are introduced.
The purpose of this article is to make our readers aware that some significant improvements in digital printing have been introduced over the past 12 months or so, culminating with the recent introduction of ImagePrint 10 for the Canon imagePROGRAPH Pro printers.
The prints I am making today are so much better than the prints I was making a mere 12-18 months ago, that I often feel like re-printing everything.

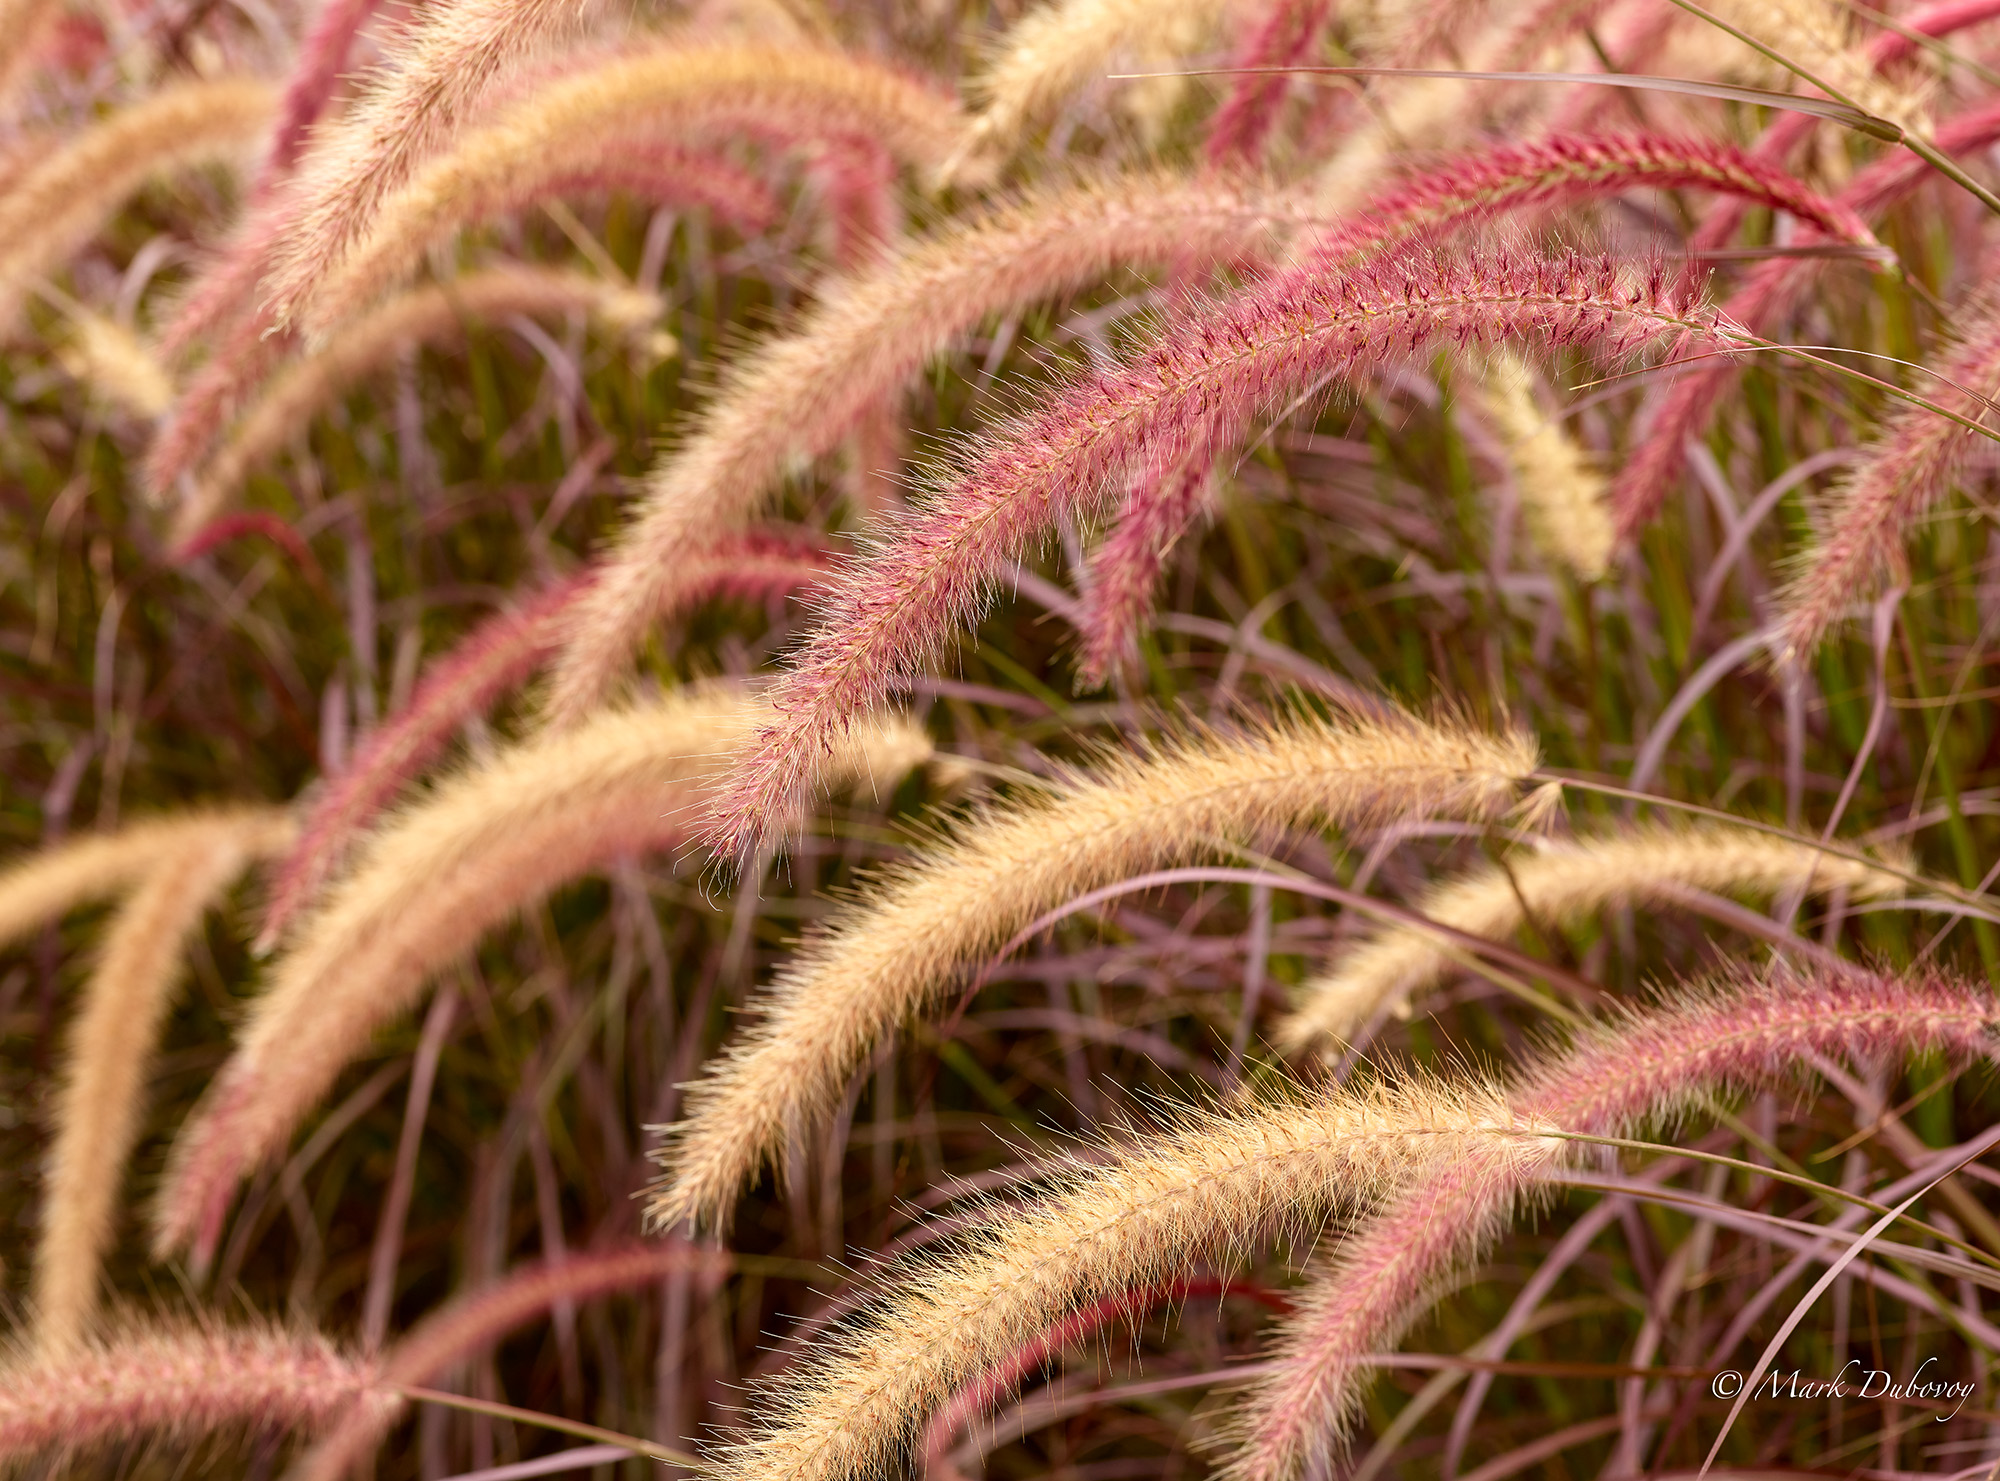
The Birds.
Northern California Coast.
PhaseOne XF with 80 mm Schneider Blue Line lens.
The First Step: A New Printer
I tend to be agnostic when it comes to brands of equipment. To me equipment is just a tool to achieve a final result. As such, I gravitate to the best tools and the best customer service as opposed to the logo printed or engraved on the device.
I mention this because many people become brand zealots (for lack of a better expression) when it comes to the equipment they use. I find this to be the case with many photographers when it comes to inkjet printers. There are the Epson zealots and the Canon zealots. I want to clarify that I am not a zealot and I work with what seems to be the best device at the time of purchase.
This brings me to the first step of the story. I had been working with a series of Epson printers for a number of years. Last year, my Epson 9900 was beginning to show its age and have some problems. The problems came to a head (pun intended!) with a group of clogs in 3 channels. I tried everything and I absolutely could not fix the problem. The technical support from Epson was, to put it mildly, less than satisfactory
The story culminated with my coming home one day to find that something had “exploded” inside the printer and there was ink in all kinds of colors all over a valuable rug that was some distance from the printer in the same room. Archival ink and rugs don’t get along very well, so it was time to replace the printer and the rug.
I spoke to several highly knowledgeable people that I trust and respect and most of them recommended I switch to Canon. The two reasons given were first, the then upcoming introduction of the Canon IPG Pro 4000 printer (and its siblings). The second reason given was better technical support and service.
So I followed their advice and purchased one of the first Canon IPG Pro 4000 printers delivered to the US.
Initial Impressions
My initial impressions of the Pro 4000 were mostly positive. The machine seems to be built like a tank, and I very much like the concept of a user replaceable head.
I immediately noticed a significant improvement in sharpness, D-Max and color rendition versus the Epson 9900. I also noticed that the paper handling for sheets or using the main roll holder was much better designed and much more precise and gentle than my old Epson 9900.
The Pro 4000 appeared to be a significant improvement in quality of construction and print quality versus all the previous printers I had used.
On the negative side. the outside of the machine seems to have been designed by a group of engineers that design cheap appliances and were told to design the ugliest form factor with the ugliest skin possible in the ugliest color possible. It is amazing how unattractive it looks; it sticks out like a sore thumb in any room.
Another negative is that the printer can be equipped with a second roll feed. This is a relatively costly option. I purchased the second roll feed and installed it. While in principle the ability to switch rolls on the fly is a really nice feature, I have found that unfortunately the path of the paper from the second roll feed is such that when using high quality photographic papers the paper jams every time. As far as I am concerned, a second roll feed that cannot handle the vast majority of fine quality photographic papers is completely useless. Canon should warn customers prior to purchase of this option that the second roll feed only works with thin papers, and will not work with most fine art papers. My favorite Baryta papers, and every high quality semi-gloss and glossy paper I have tested jam every time..
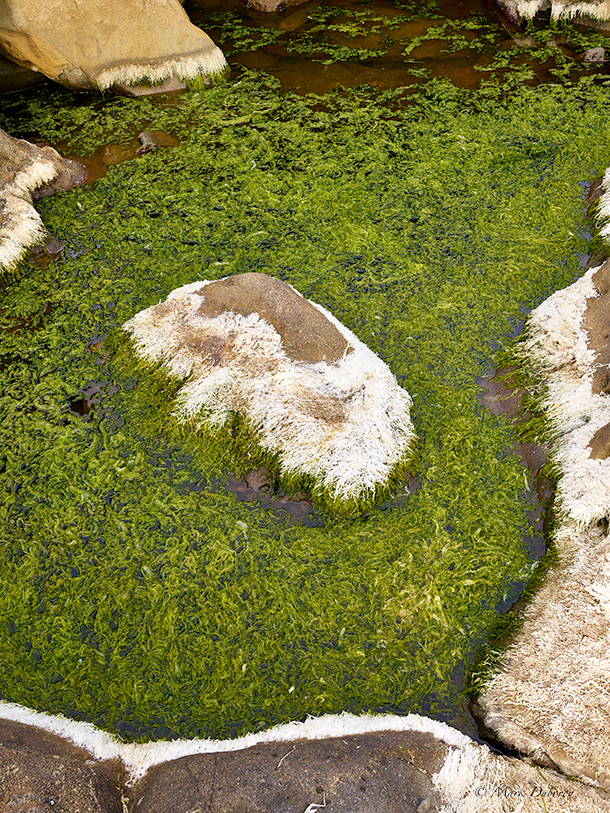
Rock in Pond.
Bean Hollow, California.
PhaseOne XF with 50 mm Schneider Blue Line lens.
Focus composite of 7 images.
In Operation
The Pro 4000 has been much more reliable than any of my old Epsons. So far, I have not had to worry about any maintenance; the printer takes care of itself automatically and simply does the job every time. It even shakes the ink cartridges by itself when needed.
I have not had a single problem with a nozzle or anything else. My dealer informs me that since the printer was introduced, he has not had a single customer complain of a clog or any other head issue.
Installing and using the Pro 4000 is relatively straightforward, however, I found the UI in the Canon software as well as the UI in the touch screen on the printer to be poorly designed.
In my experience, this is typical of Japanese inkjet printers. The user interfaces in the Epsons I have used in the past were also quite poorly designed, but I think the Canon might be worse.
My dealer recommended that instead of printing straight from Photoshop I use the Canon Print Studio Pro software utility. After some trial and error I figured out how to use it and I started to make beautiful prints, arguably my best inkjet prints ever.
I was obviously extremely happy with the quality of the prints.
On the other hand, no product is perfect, and on the negative side I must say that the UI of the Canon Print Studio Pro utility is quite poor.
There is a mystery box called “perform contrast processing” in the Canon utility that no one has been able to explain to me. No one that I, or my dealer, or the Colorbyte folks have contacted in the US or Japan can explain what it does.
What I found when checking the box is that shadow detail looks better, but the saturation increases and there is also a visible increase in noise in the print. The noise looks like a fine graininess, and it is akin to the noise produced when increasing the ISO in an image. I have to wonder if there is some extra sharpening going on behind the scenes, when this box is checked.
While I definitely liked the improvement in the shadows when checking this box, I was not happy with the extra noise or with the fact that the saturation made it so that the print no longer matched my master image on the monitor. So I ended up developing my own manual adjustments to improve shadow contrast and D-Max without increasing saturation, sharpening or noise.
Call me maniacal if you will, but I want my print to look as close to the master image on my monitor as possible. I spend hours of meticulous work making the best possible image and I do not want the printer or the printer company to tweak my images in any way, shape or form and produce something different from my intended result.
My bottom line is that the mystery button mentioned above should not exist. I think a printer company should deliver the best quality possible from a specific printer as the default, and leave all the control to the photographer.
The formatting tools in the Canon software are very disappointing. I wasted quite a bit of paper because even when the software indicates that an image and the paper orientation are such that the image fits the paper properly, sometimes the printer prints the image rotated by 90 degrees from what the software indicates. When this happens, the image obviously does not fit and one discovers the problem after it is too late and a sheet of paper or a section of a roll has already been wasted. Even with the most current updates, the software seems to have bugs and design issues.
This is my way of saying that I was thrilled making better prints than ever before, but the interface with the printer was at times frustrating.
The Second Step: ImagePrint
I have known John Pannozzo, President and Co-founder of Colorbyte for a number of years. We have had periodic conversations over time about the potential of introducing ImagePrint for Canon printers.
Note: ImagePrint had only been available for Epson printers in the past.
So, as the software reached the point where it was about to be ready for testing, I volunteered to be an early tester.
As anticipated, there were some early glitches, but those were fixed before the software was officially introduced and released for sale.
I have now been working with ImagePrint 10 long enough that I feel very good about the quality and robustness of the product.
As of this writing, ImagePrint 10 for Canon Image Prograph Pro printers is finally available. It is, in my humble opinion, the tool of choice if you want to have a good user interface, the most extensive functionality available, the best profiles and the ability to make the highest quality prints that your printer can deliver.
The product is not inexpensive. For professional printers, the product usually pays for itself in time and material savings alone. For most users, the savings in valuable time, better image quality and the powerful tools and convenience are the main factors that justify the price.
This is not a product for those who are happy with somewhat less print quality than the ultimate their printers can deliver, are not concerned about the value of their personal time, or may not have a need for the more sophisticated tools in ImagePrint.
If you belong to this second group, you can stop reading this article now and go watch a movie or go get some healthy exercise or spend quality time with your significant other, or do something that is more pleasurable and more important to you than reading the rest of this article.
Because I used ImagePrint with my Epson printers for years, stepping back into it immediately felt like putting on an old comfortable pair of slippers. There are a few very minor differences. In general, it feels almost exactly the same as the Epson version I was using before.
When I prepare an image for printing, I am very comfortable with the tools and the user interface.
But much more importantly, my prints have gone up in quality yet again!
The prints using ImagePrint 10 are better than the prints I was making using the Canon printer driver and the paper manufacturers’ profiles. Sometimes the difference in print quality is subtle, sometimes not so subtle. It depends on the specific image and the paper used. One thing I can say for sure, is that they consistently match the master file on my monitor better than my prior prints.
In general, prints using ImagePrint have less noise and give the eye/brain system an instant impression of being “smoother and cleaner”. They also look less harsh than prints using the factory printer driver in the sense that subtle highlights, edge contrast and micro contrast look more natural with absolutely no reduction in sharpness. Subtle color transitions also appear more natural. Finally, prints using ImagePrint deliver more shadow detail and in most cases higher D-Max versus the factory driver.
I am convinced that the printing algorithms used by ImagePrint, as well as the dot patterns and ink delivery recipes they use continue to be superior to what the printer companies provide with the standard drivers
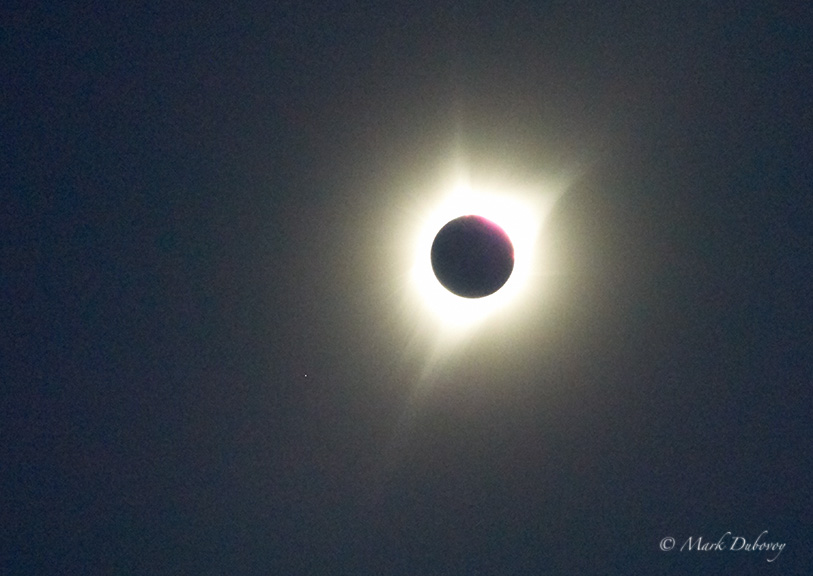
Solar Eclipse 2017.
Nikon D 810 with Nikkor 70-200 mm lens.
An Brief Overview of ImagePrint 10
This overview is extremely short and barely skims the surface of all the features and functionality of the product. The purpose of this overview is only to give some idea of how the product works and how to use it.
ImagePrint basically takes complete control of the printing process. Everything from paper profiles to color management, to the way the head deposits the ink on the paper is controlled by the software. There are many advantages to a closed loop system like this, since it completely eliminates potential issues between the operating system and applications from different vendors, such as color management issues.
While paper manufacturers offer profiles for their papers, the profiles supplied by ImagePrint are superior and produce better prints. Colorbyte has been working on profiles for decades and has a very extensive library of downloadable profiles that can be placed in the “Profile Valet” or in the” Favorite” tabs in the application.
The way to use ImagePrint 10 is quite straightforward for a product with this level of sophistication. The UI is simple and utilitarian.
There is a browser that allows you to find an image and import it by dragging it or double clicking on it.
There is a tool bar with a number of basic tools such as centering the image on the paper, rotating the image and others.

ImagePrint Tool Bar
The main part of the interface is called the Dashboard.
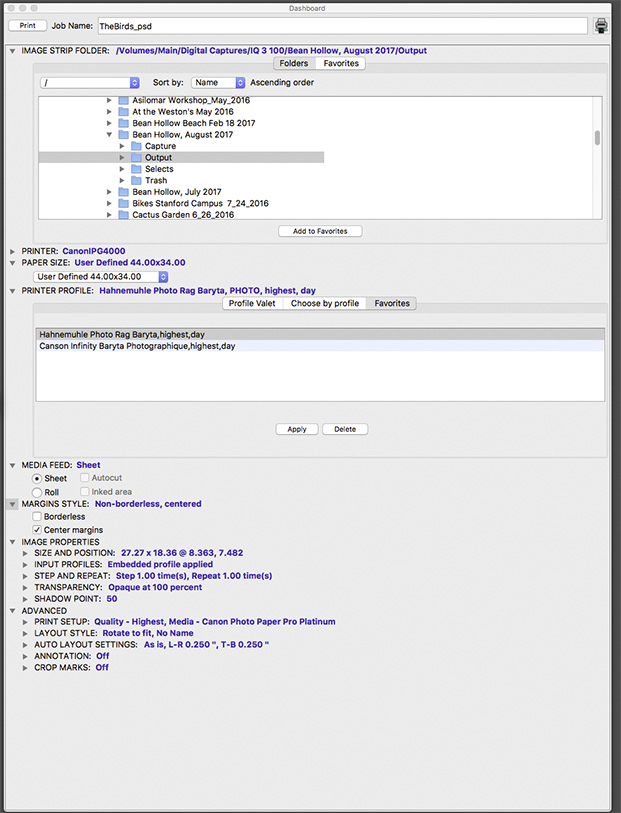
ImagePrint Dashboard
As you can see, the Dashboard allows you to access multiple functions, such as choosing a profile, paper size, source and layout, printing preferences, and many more. Most of these functions expand into sub-menus and options when you click on them
ImagePrint also has a number of editing and correction tools, including color correction, sharpening, and some unique tools like gamut tools that allow, for example, to print B&W images with the look of dual toning for the shadows and the highlights.

The color correction tool.
The layout tools available are extremely sophisticated and include multiple pages, multi-image layouts, preferences that produce minimum paper usage when printing multiple prints (of different sizes) on a single sheet and much much more.
A full description of the product is beyond the scope of this article. I hope that this brief description at least gives some idea of the function and features of ImagePrint.
Readers interested in finding out more about the product may want to download the free trial version and give the product a test drive.

Pines and Solar Eclipse.
Nikon D 810 with 58 mm Nikkor lens.
Conclusion
These are interesting times. It seems that less and less photographers are making prints. Many are satisfied with showing their images on a screen or posting them on the web.
And yet (in my opinion), there is no substitute for an actual print. There is something special about a work of art on a fine paper. The resolution and color gamut is far superior to any screen an average viewer is likely to use. The basic impact of a framed image on a wall is quite different from looking at a screen. Because of this, I believe there will be a sizable number of viewers that will continue to appreciate prints for the foreseeable future.
For those of us that are willing to undertake the effort and spend the time required to make a fine print, these are very exciting times. The quality available in inkjet printing today is a step above anything we have had before, even in the recent past.
I am thrilled to have the tools and the printer technology that can deliver such beautiful results.


Your Thoughts