
Introduction
It seems that one of the basic mantras of digital photography today is to “just get the picture”.
I have heard this advice many times in workshops, I have read it on the web and manufacturers often tout the capabilities of their equipment in order to “get the picture” with little effort by using their auto settings.
I guess the key question is whether this attitude and this frame of mind helps a photographer get the picture which to me means the best and most compelling image possible; or whether this results instead in getting a picture meaning an average or mediocre image in most cases.
Exploration
Let’s explore these ideas in more depth.
In my biased opinion, the frame of mind of “just get the picture” can often result in what I call the encyclopedia syndrome. The photographer captures an image that is decently focused, decently composed and looks good on the screen in the back of the camera, but there is really nothing special about it. It looks like any image that can be found in an encyclopedia.
I basically find this frame of mind to be good for the advertising departments of camera gear makers or for people that want to give quick advice for expediency’s sake, but I do not think this frame of mind serves the photographer well.
I am currently preparing to travel to Africa to photograph the beginning of the great migration. Exploring this topic reminds me of some of my experiences on Safaris in Africa where I have observed quite a few individuals shoot many thousands of images with the latest and greatest gear , but in the end it is practically impossible to pick even a single image that rises above mediocrity.
The encyclopedia syndrome is rampant on Safaris because people just want to “get the picture” of this animal or that animal. They rarely think about a message, about telling a story, about the style they want to convey, about the lighting or anything else. After shooting thousands of images they often end up with a lot of files representing a perfectly boring set of mediocre images with little or no artistic value.
A Few Suggestions To Improve Your Images
The suggestions in this section are based on my experience, and as such they constitute my personal (and thus obviously biased) opinions. Some people will disagree, and that is just fine. This is what makes the horse races!
Also, please bear in mind that there are no absolutes in this world. For those of you who have a tendency to take things literally, I would suggest that you do not take every word like gospel. There are exceptions to every rule and to every suggestion.
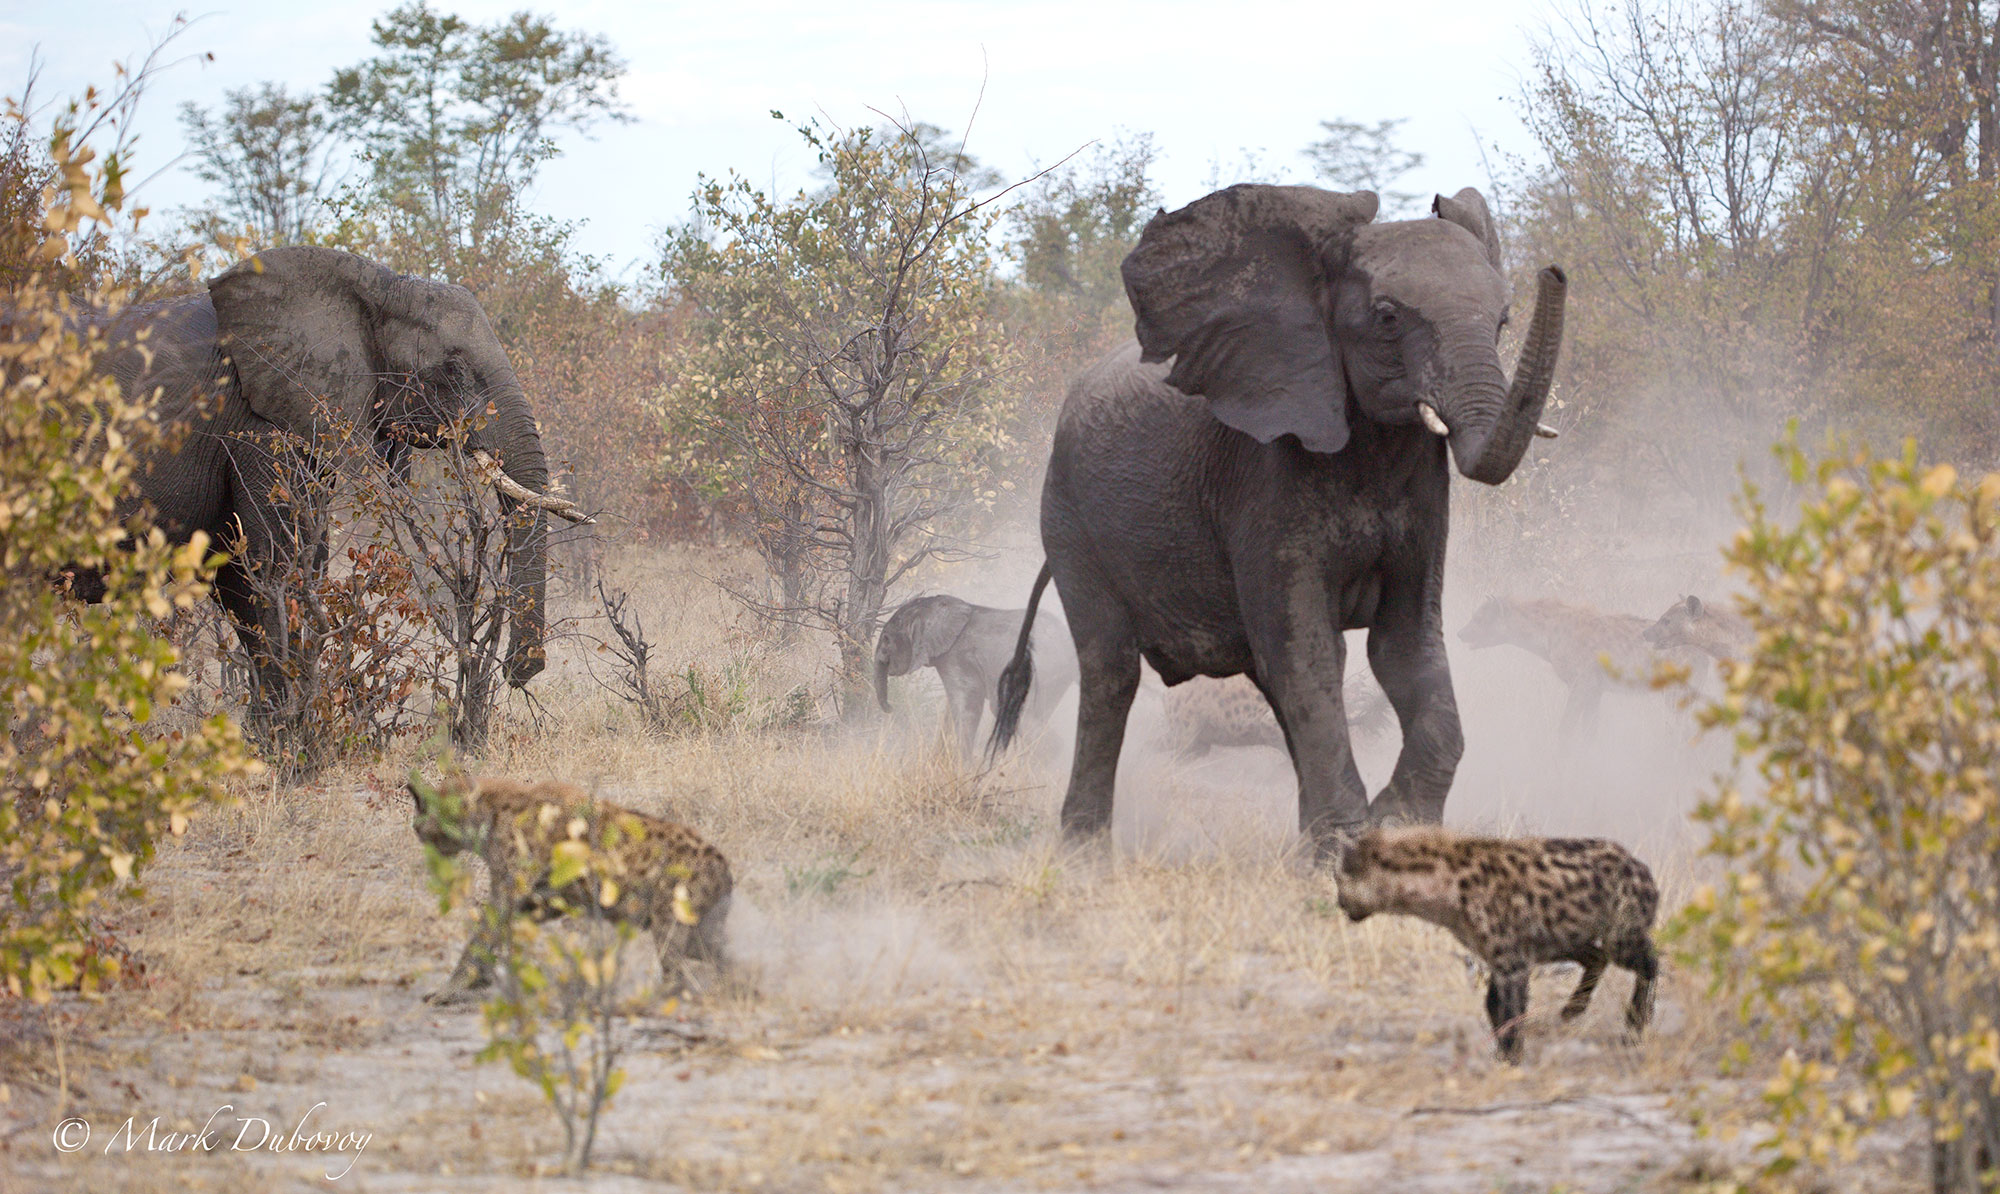
The image at the top of this article is a living example of following the suggestions in this section, so I will refer to it a few times in the text below.
The other wildlife images shown in this article were taken on other trips to Africa using a different approach to the subject, a different style and different equipment, but they are also examples of following the basic suggestions below.
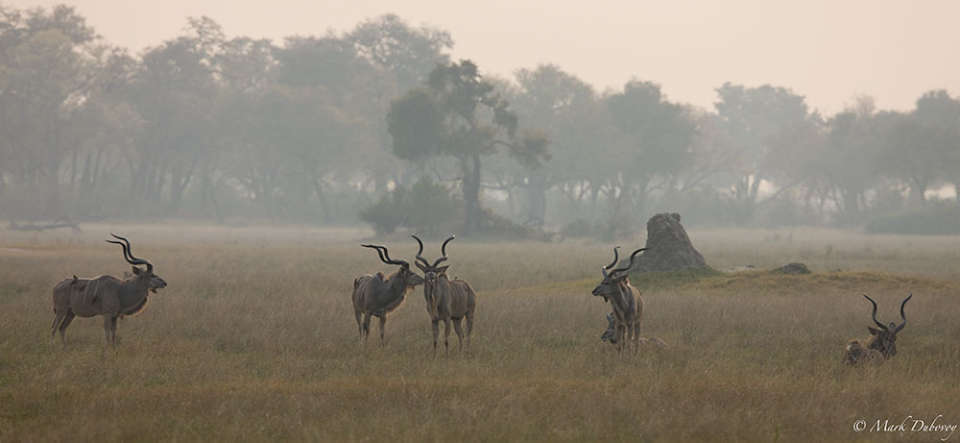
Kudu
-
Determine the “look and feel”
My first suggestion is that before any assignment, whether in the studio, near home or on a far away foreign adventure it is important to step back and determine the “look and feel” one wishes to achieve on that particular assignment. I find that this discipline affects everything.
- Knowing the desired “look” of the images affects the equipment chosen for the project, it affects the lighting in the studio, outdoors it affects the lighting conditions one is searching for, it affects the color palette (or the contrast and filters in B&W), it affects camera positioning, when using models it affects the clothes and the makeup. The choice of perspective and many other key parameters are also affected. Knowing what one wants, and being prepared ahead of time makes a big difference.
- In my experience, failure to go through this relatively straightforward planning step will almost always lower the quality, consistency and subject rendering of the final images.
- Regarding the image at the beginning of this article, I wanted my images of this trip to Africa to have a more intimate feel versus the usual fare of long lens wildlife photographs. I also wanted to transmit a better appreciation of the environment around the animals. I craved extremely high quality in terms of resolution and lack of grain. I concluded that to get the look and the quality I wanted I would have to get closer to the animals and use a format larger than 35 mm. I settled on a Leica S as the right tool for the job. The longest lens made for the Leica S is the 180 mm (approximately 130 mm equivalent in a 35 mm DSLR). The (relatively short for wildlife) focal length required me to get a lot closer to the animals and the wider field of view resulted in the environment being included in my images. This is exactly what I wanted.
- It is extremely important to emphasize that picking the right tools is obviously not enough.
- The entire time I was shooting I had to think about including the environment in an artistic way, telling a story (more about this in the third recommendation below), finding the right lighting conditions, shooting in the proper locations at the right time of day, pursuing subjects that would allow me to achieve my goals, etc. The final judgement is always up to the person looking at the image. In this vein, I hope the reader will agree that the image at the top of this article has the kind of look and feel that I was pursuing.
- Note: For the other images shown in this article my approach was very different: It was to tell a story of multiple individuals of the same species with wide format images. I decided on wide format to allow space for each individual to tell its own story as well as the entire group to tell a joint story. I also decided on long lenses and 35 mm cameras because the compression and the shallow depth of field allow each individual to clearly separate from other elements in the image.
-
Try to develop a style
- This takes years to achieve, however if you constantly think about developing a style and experiment to try to get to the style you imagine, you will continue to improve and you will rarely be stuck in a rut. Part of developing a style usually involves not just looking at your own work, but learning from fine photographers as well as masters of images in other media. Go to museums. Read art books. Look at as many images as you can, whether photographic prints, paintings or other media. I find that studying key scenes in movies is extremely helpful as some movie makers are true masters of imaging. Explore the work of fine photographers ( it is quite easy to do this on the web, but I would encourage you to look at prints instead whenever possible), painters, illustrators, film and video artists, lighting experts, cartoonists, etc.
-

Lions
-
Don’t just shoot a picture: Tell a story!
- Images that tell a story can be much more powerful than images that are dramatic or impress at first but do not tell a story. The viewer of an image that tells a story tends to spend time exploring it. Standing next to such a viewer, one can often see the eyes scanning different parts of the image as the viewer tries to understand it better and put it all together. Images that tell a story are interesting enough to prompt the viewer to go back and look at them again. In general, they tend to have more impact in the long run and more staying power over time as true works of art.
- One of the interesting aspects of images that tell a story is that the viewer can develop their own story without any explanation from the photographer. Sometimes, the viewer’s interpretation may be somewhat different from the photographer’s, but in successful images the most important aspects of the story tend to be the same for both.
- When I photographed the mother defending the baby elephant at the top of this article I was trying very hard to tell the story. This image was taken during a massive hyena attack on a group of elephants. There were approximately 50 hyenas and a dozen or so elephants involved in an epic battle. The hyenas picked a very young elephant as their target and were incredibly clever, organized and relentless in their multiple attacks. So were the elephants in terms of defending the young target. The whole thing played out like a medieval battle over several hours. The strategies and tactics of both sides were impressive. One could literally write a military strategy essay based on this battle. I hope the image transmits the fury and the desperation of the mother. It also shows another adult female elephant (most likely the mother’s sister) helping to fend off the frontal part of the attack. At this point, the frontal part of the attack was a calculated diversion by the hyenas in order to open up a flank that allowed a second group of hyenas to penetrate the perimeter and attack the target.
- As you look behind the mother, you can see a group of hyenas coming in from the right flank attacking the baby inside the defense perimeter. This image also depicts how the Hyenas in the front taunt and distract the key adults in order to try to isolate the baby and allow the rest of the pack to attack it. The whole idea for me was to have this single image tell the story and transmit the feeling of desperation of the mother and the aunt, as the young elephant faces the inevitability of the final outcome.
-
Persevere, do not give up
- Most great images do not just happen by accident. It takes dedication, focus and perseverance to produce good work. In the case of the image at the beginning of this article, one of the key defense mechanisms of elephants is to immediately move into the thickest brush and woodlands in the area. A second defense mechanism is to produce massive amounts of dust and hide behind it. A third defense mechanism is surprise aggression from behind the dust: Periodically a large elephant would unexpectedly blast out of the dust at top speed in full charge and destroy or kill everything in its path. A fourth defense mechanism is mobility, elephants do not stay still and they can move at a very fast clip, even inside the thick brush and woodlands. This made following the action and shooting good images almost impossible.
- Suffice it to say that it took several hours of brilliant tracking by our tracker and extremely difficult and perilous off road driving before we reached a clearing where I had a few seconds to properly shoot some of the action. In case you wonder, yes, we were all pretty scared of the obvious danger of being “up close and personal” (in an open vehicle with no top, no windows and no doors) with a large number of attacking hyenas and furious charging elephants coming out of the dust in unpredictable locations and directions.
-

Qualia
-
Take Control
- One lesson I have learned (the hard way!) is never to let either the equipment or another person take control of the shooting process. I never let the equipment make any decisions for me. Even when shooting fast action I prefer using manual focusing or tweaking the focusing ring after the camera autofocuses. I also prefer manual exposure and relying on my reflexes and not a motor drive for the right moment to shoot.
- I do not want the reader to get the impression that I am a complete bigot against automation. I am not. The issue is that cameras do not take pictures, people do. Cameras are not smart enough to read minds or to capture perfectly every possible image in every conceivable situation. Therefore, they make the wrong decisions quite often. They will focus on the whiskers of a cat when I want to focus on the eye or the ears or the tail, or they will make big exposure mistakes in certain lighting situations versus what I need to produce the highest quality prints. While sometimes I do use functions such as autofocus as a first cut to get me in a general ballpark, I find that a further manual adjustment almost always yields a better result and in many instances a manual adjustment is an absolute necessity in order to capture the image as I want it.
- For maximum success, the photographer has to take control of the process.
-
Stay flexible
- In spite of the above 5 recommendations, you need to stay flexible. The world is full of surprises and sometimes an unexpected element or a new idea can lead to superior images. Stay aware, keep an open mind, be flexible and adapt your vision to unforeseen circumstances.
Final thoughts
Sometimes the most important and the most enjoyable moments for me are not the times when I am shooting, editing or printing, but rather those moments when I decide to step back, put the camera away, forget the computer and the printer and either ponder my style, think about shooting and printing strategies, the desired look for an assignment or best of all: When I experience with all my senses the beauty of nature and other subjects.
In other words, some of the most important moments for me tend to be the quiet moments when I am not actually making images, but I am still fully involved in photography.
If there is one piece of advice I can give you that I hope you will follow, it is that you make time for these types of moments and fully savor them for as long they last.


Your Thoughts